Virtual Private Networks are a must-have tool for Windows Server operators. A VPN allows network operators to ensure maximum security and privacy for their systems.
If you need an up-to-date guide of how to install and configure a VPN on the latest version of the server OS, Windows Server 2019, we’ve got you covered. Without further ado, let’s get started:
Follow These Simple Steps
Setting up the VPN will be a two-stage process… In stage 1, we will set up a remote access point (or a remote access role) that can access this network from outside.
Stage 1: Installing Role for Remote Access
We start by installing Remote Access:
- Open up Server Manager.

- Select Manage.
- Click on the option Add Roles and Features Wizard.
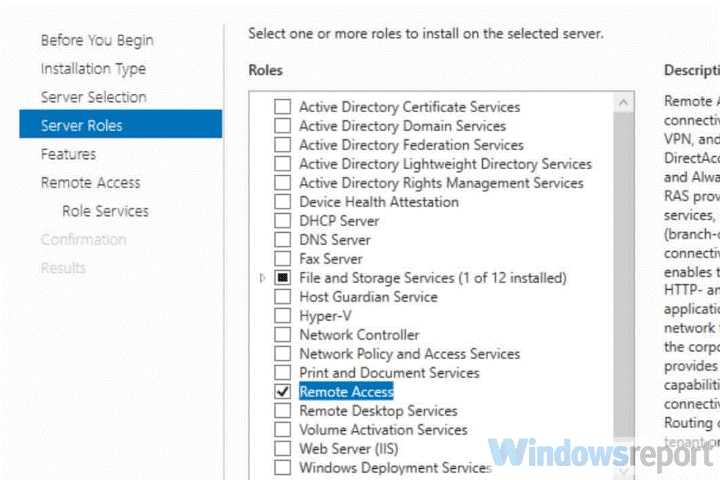
- Check the Remote Access check box.
- Click Next.

- On the step of Role Services, check the Direct Access and VPN (RAS) check box.
- Click Next.
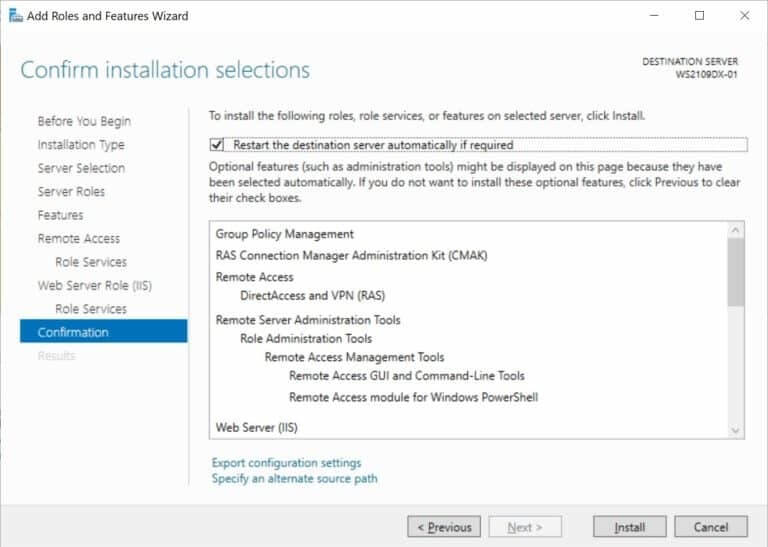
- On the last step Confirmation, press the Install button. This will install the Remote Access Role and will reboot the system as well.
That’s it, stage 1 is complete.
Once rebooted, we move on to the next and final stage of the installation.
Stage 2: Setting up VPN
Setting up the VPN requires us first to install the VPN and then configure it. Windows Server 2019 has a dedicated wizard for the job.
1. Installation
Now, after installing Remote Access Role, we can begin with the VPN installation.
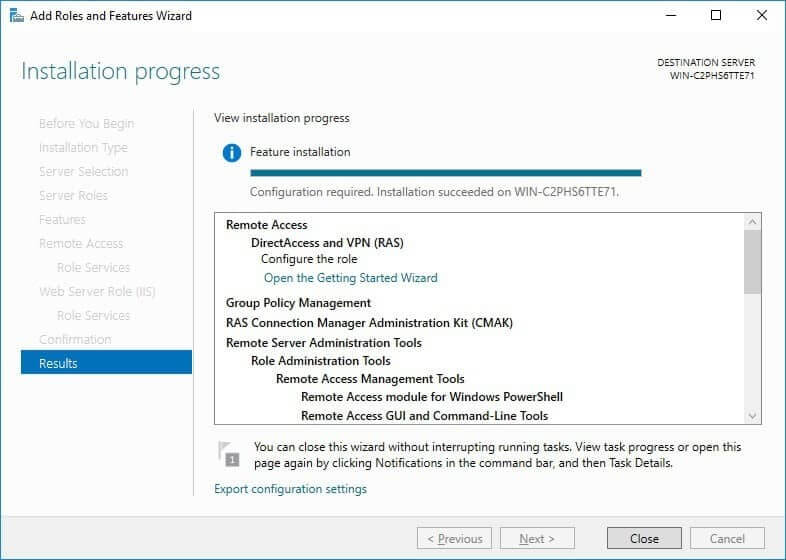
After the installation of the Remote Access Role is finished (it may take some time), the link for opening the “Getting Started Wizard” will appear.
- Click on Open Getting Started Wizard. This opens up another wizard (Getting Started Wizard for VPN).

- Here select the option Deploy VPN Only on the first window. This will take you to Routing and Remote Access Management Console.
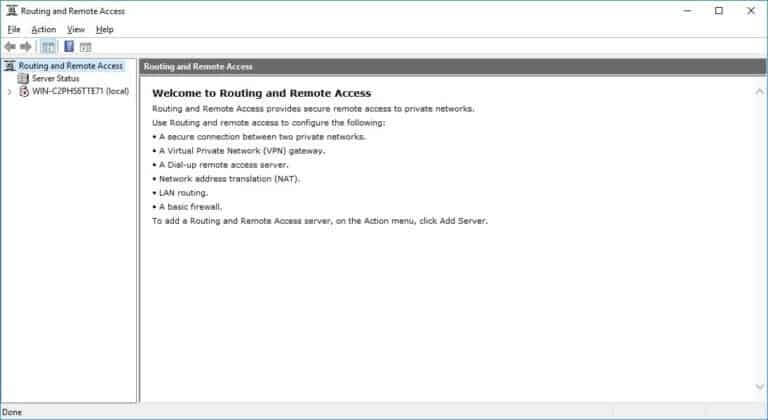
- Select the name of the server, given on the left side of the panel on the Routing and Remote Access Management Console by using right-click, and then click on Configure and Enable Routing and Remote Access.
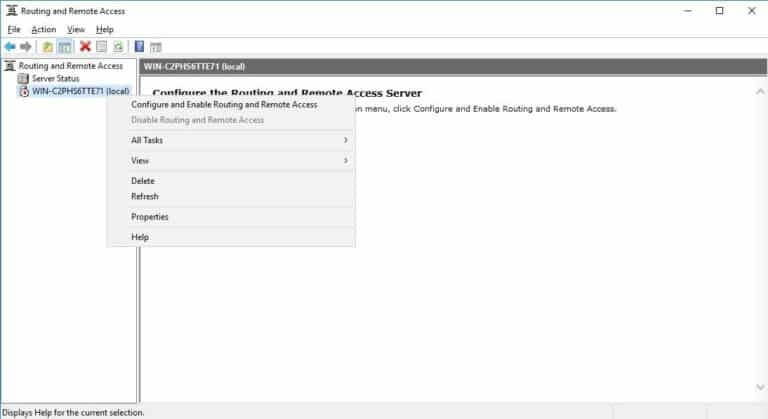
- This will open up a new wizard: Routing and Remote Access Server Setup Wizard.
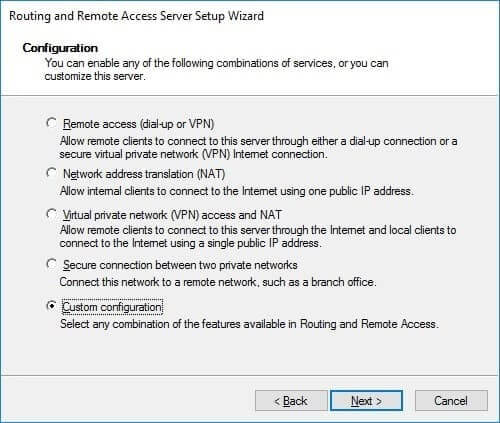
- Here, select Custom Configuration.
- Click Next.
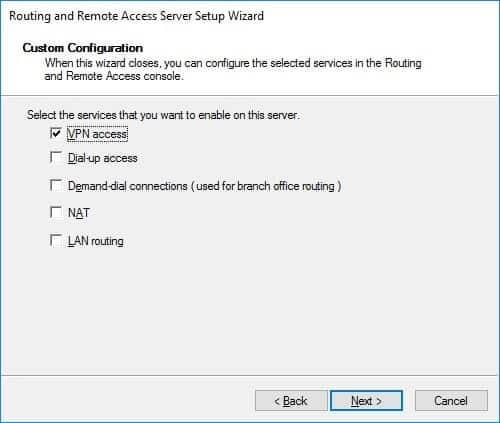
- Here on the next step, select VPN Access.
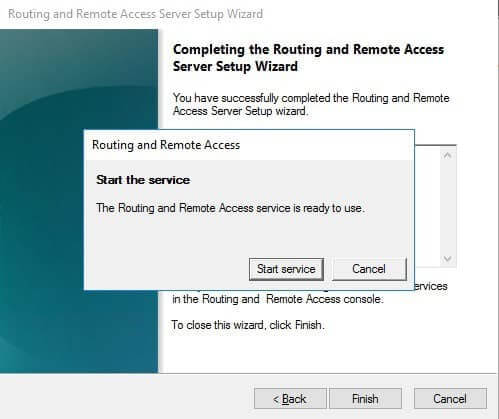
On the next step, clicking Finish will show a dialog box asking you to start the service. Click on Start service.
This finishes up the installation process and we are now ready for the configuration part.
Configuration
Now that we are done with installing the VPN, we can now open the firewall and direct the ports towards our Windows Server so that traffic generated by this server can pass through the firewall and is not blocked.
You can also picture this as connecting a VPN user to your newly created private network.
For this, first you need to set up the following ports depending upon which protocol is being used.
- For SSTP: 443 TCP
- For L2TP over IPSEC: 500 UDP and 1701 TCP
- For PPTP: 1723 TCP and Protocol 47 GRE (PPTP Pass-through)
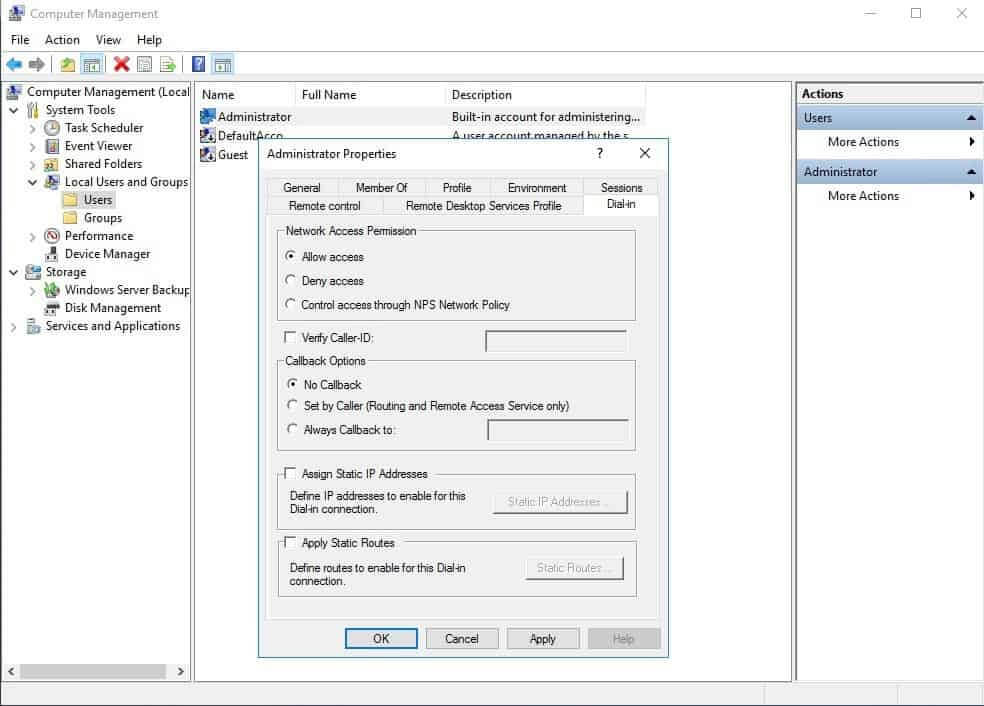
Once the installation is done, you need to check whether the users you want connecting with the VPN have Remote Access enabled.
You can enable the users…
- In a standalone server through the Computer Management MMC,
OR
- Active Directory user’s User Properties in a domain environment.
Check to see if there is a DHCP server available. If not, then you need to configure a static IP address pool.
To add a static IP address pool…
- Go to the properties of the newly installed VPN server.

- Select the IPv4
- Select the static address pool radio button. Press Add.
- In the new window of IPv4 Address Range, add an IP address. Make sure that the static address pool and the subnet the IP address belongs to are the same. This will enable the users to reach the server without being shut out.
- Click OK, then Apply and you are done with the configuration.
And there you have it! You can now operate Windows Server 2019 with a VPN.
If you need a VPN for windows instead of Windows Server, please be aware, they are 2 different OS’s so it is a different process, this guide is only for Windows Server.